Light Sixteen (DMX) Controller
by S.Sims


  When I was just a kid, I read about a fad in the 70's where people were making audio frequency band sensitive light controllers called Light Organs. On my very limited budget, I managed to make a reasonable facsimile from a piece of plywood with various holes drilled randomly through it. This was placed over a built-in shelving unit in my room, and a light placed in behind. The light bulb was hooked to the amp, which had so much power that it'd light the bulb if I turned it up!   After a while I discovered LED's  and pushed some into some of the holes, which also ran through various components from the speaker output. This was my first light organ.
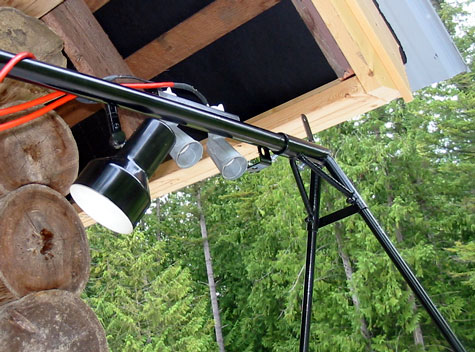
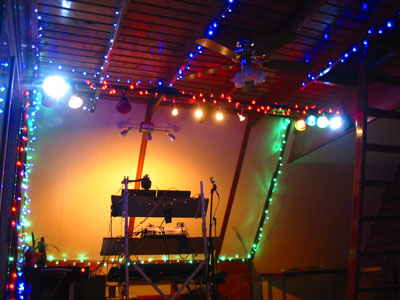
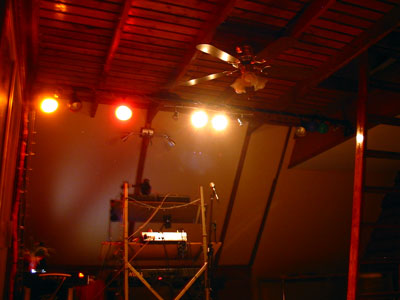
   Now all these years later, I have the urge to build a second. It's what I need to add some pizzazz to live performances inside, or at night. Something that can remain static during a slow song, or flash and dance during a fast one.  Also there needs to be colors, and even a spot on me, so everyone knows where the tunes are coming from.
That was the basic starting point. Things have evolved quite a bit since July, and  at  last ,  it has become a reality.

  For you non-tekkies, I have highlighted tech stuff in green so you can skip over it, thus saving you time, and me having to try to explain things that are beyond the scope of this page.

  I have interfaced it via MIDI, so it can be controlled from my favorite DAW, via CC's or Notes/velocities, and now it has a stand-alone mode to work light a frequency-based light organ. The newest addition is a chord based trigger that, for now, works with FL Studio to turn on & off loops in live mode. You can imagine the possibilities there hey?
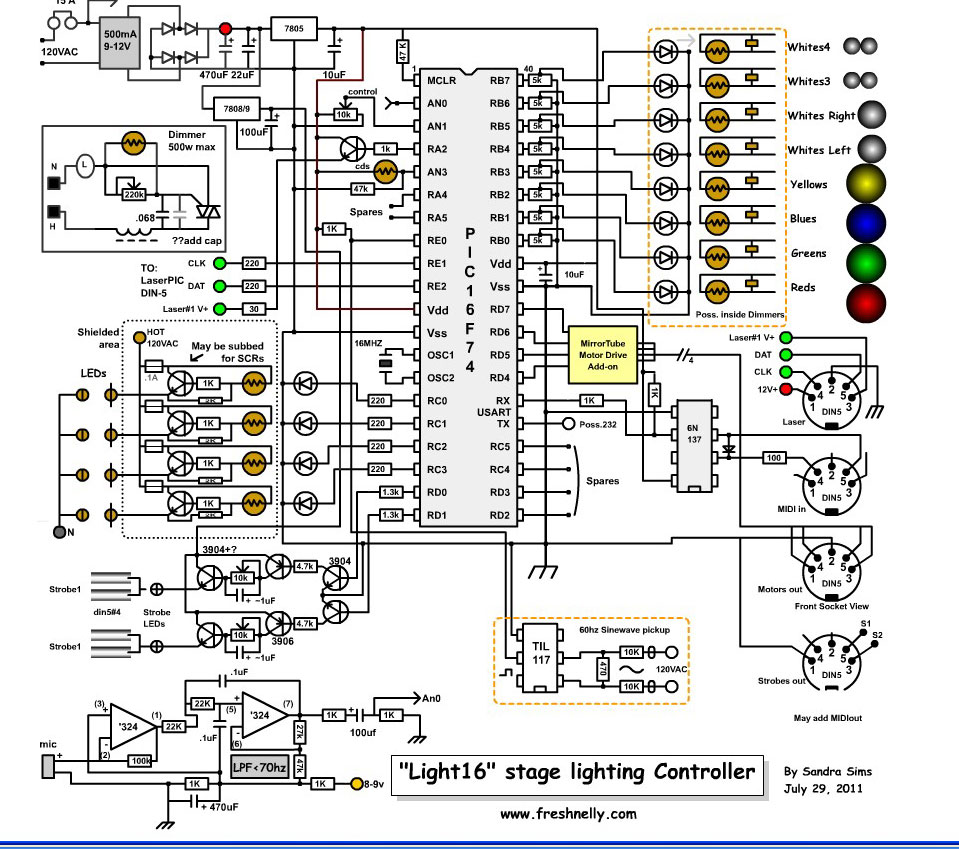
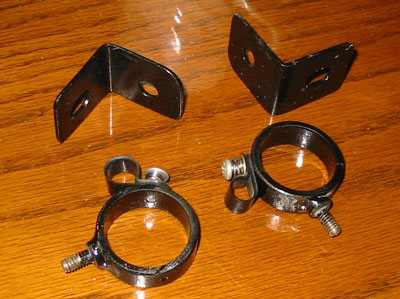
The schematic to the left is the result of some circuit design, some programming, and a whole lot of guess work. I've scribbled updates all over it, and it's really different. I'll post it once it's updated properly. Click on the 
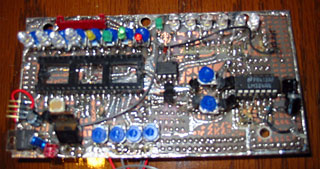
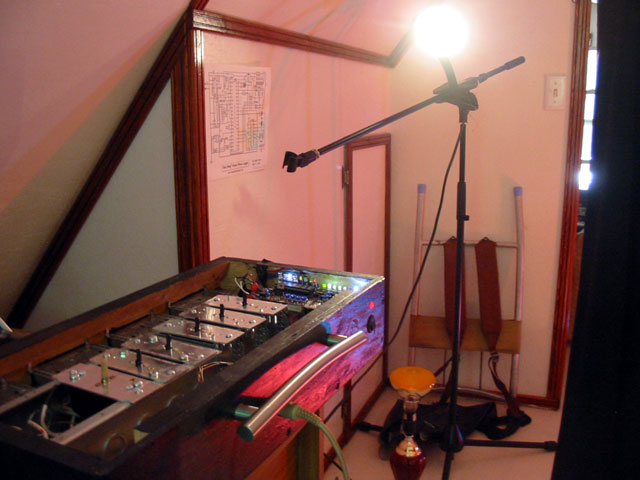
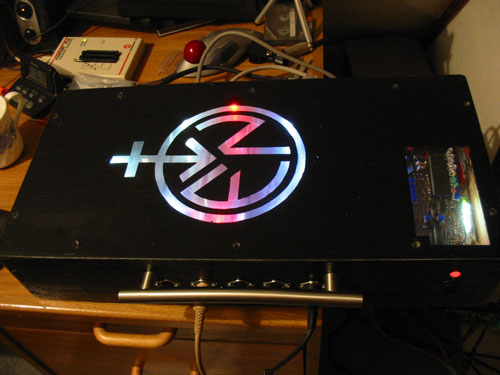
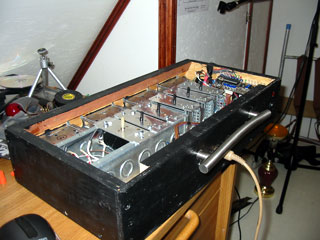
image to enlarge.

The main chip is a PIC16F74 MCU, one of my favorites because of the USART, larger program memory, 8 channel ADC, and lots of port pins.

I will be listing the program on this page for you PIC nerds out there, but for now I'll keep it simple.

The photo, top right, shows the case everything is going inside of.  I went with wood because it's easy to attach things inside it.  A set of 8 dimmers will be used for the main (hi-power lights) which will be mounted into proper electrical boxes. This way, fire is a minimal hazard. (Nothing worse than equipment starting on fire during a performance! Or just failing for that matter)

  The lower right photo is the hand-drawn board, which almost etched perfectly. Sodium sulphate still not as good as dirty ferric chloride.

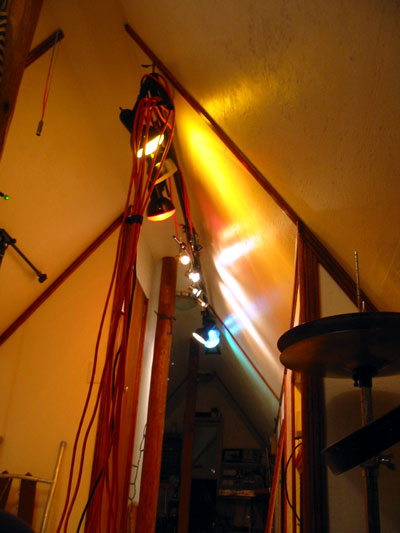
The secondary lighting is Christmas lights, 4 strings. These are low wattage so can be driven with modified "night lights" from the dollar store. I needed 8 of those for the CDS cells inside them, to provide isolation inside the big dimmer controls. A TIL-117 NPN type opto-isolator drove those SCR's no problem! Even with the slow response of the LED-CDS isolators, I noticed a flicker in the lights, especially when on dimmed settings.


  I realised it was being caused by a phase difference between the 90 hertz PWM rate, and the 60 hertz line frequency. So, taking the logical step, I changed the PWM routines to sync to an isolated 60 hertz input from the line. It worked right off, and phasing shouldn't be a problem from here on in.

In fact, the SCR's for the <7 watt Xmas lights wouldn't have worked any other way. They still flicker a little, but that's mostly from lack of load on the SCR. I may put in some resistors to compensate, it's actually a cool effect, so I'm undecided!

  This photo shows the Light-16 in operation. A single picture does it no just at all so I have uploaded a video to youtube for your pleasure!

(Below)  I know it's not the best yet, but without dropping a couple of grand, it's the best for now. The next addition is a set of follow spots, or a moving head style light. Mine will do a vertical pan of 360º non-stop, and cover horizontal of about 30º each side. It's a top-secret design, so I won't unveil it just yet ;)


    For a final touch, a masked off lexan lid reveals, I couldn't help it, the Fresh Nelly logo all backlit in 3-D. It looks way cooler in real life! Kinda 3-D


Mounting Bar
 I have just finished the stand that will support all of the lighting etc. I decided to go with a "swingset" shape which is pretty solid, even in a good wind. All of the sections are less than 7'2" so it'll fit in our little truck as we roar out to a gig. Looks like my road crew (Gena) just got a whole lot busier....
 Of course she'll be vying for day performances now won't she?


It needs to have a cooler name than "mounting bar" really. It's a marvel of scrap yard engineering...ok, I bought those 1/2" lengths of
conduit new. $7 each. I welded on tabs (being careful to grind off ALL the galvanized surface before welding as it is really bad
for the lungs) welded together some gussets, and painted it all with tremclad. The join (below) is just bigger pipe welded over.

  The bolts act like set screws  so it won't slide apart in the middle of a rockin' show!  Notice how fat the wires get there? That's so it can all come apart without having a tangled mess of wire. Some are PC plugs & sockets torn out of old computer power supplies, others are butchered extension cord ends.

All in all there's about 150 feet of cheap Wally world extension cord. The little fairy lights were just thrown on and wrapped around. The little light bar with the MR16 size halogens (right) was donated by our new neighbors, and the metal flood mounts (top-right  photo) was donated by our neighbor Jamie. Gena donated the brown light pots, closest lights in this photo.

Wow! It's so nice to have so much support, guess I better throw a dance party once it's all done.  The initial test of positioning was good, although the two flood mounts are a bit too close together.


The brackets to the right are to mount the 4 strobes...uh 4/$6.95 LED flashlights that are really like strobes. And longer lasting than those xenon bulbs.

The collars allow them to be rotated any direction.

Now the new studio is finished, everything can be moved down there, and a better idea of the way it'll look during a performance will be at hand, for better of for worse....

Trying to figure out where to point the lights is still high on the to-do list, and the dark floor isn't going to help matters. Consider it a worse-case scenario!

I've also created a couple of VST's to show the light notes (not CC's)


OMG! It's great! I haphazardly strung those fairy lights across the ceiling, but even so, it gives a real party  atmosphere!
I've set the read and yellows to just flash with the music, but the blue, green, and white ones twinkle all over, as well as pulsing to the music, giving it a real techno-feel.

Those  3 lights on the wall aren't part of the rig, funny...they're not even hooked up yet lol.

I've done  a short performance and posted the video below  on youtube, so you can see for yourself.

 -

-


  Stay tuned...


 Since I last posted on the technical part of the project, I've added 2 really cool features:
     (1) When the unit is fired up, it defaults into "Light Organ" mode. This uses a mic, LPF,  and programming to emulate a low frequency counter. This yields surprising results and is quite interesting to watch with different types of music. Any MIDI signal, except MIC GAIN/MIC TIME/MIC OFF will reset it into the original mode. Conversly, any MIC control adjustment will put it back into light organ mode.

     (2) I've added something I've dubbed "Chord Magic". It's not only useful for lighting, but can be used to trigger other events in FL studio. A return MIDI line has been plugged in so the Light16 can send back MIDI note data when certain chords are sent on channel 13. This in turn can turn on patterns while in Live Mode in FL Studio. The new FL Studio 10 has for some reason removed the indicators so each sequence must be terminated by a special note ( in piano roll ) or one wouldn't know what was on or off! I have made a default .flp and everything is much easier.

I have drafted up an owners manual to give a better idea of how everything works (and so I don't forget!!) MSoffice or WordPad will open it.
 

Cheers!

Sandy


     I will post updates/schemas/program as soon as they are done
 

Oct27 2011