"Show-In-A-Box"
Stage Control Center Display


A Nice Colour Display!

*Note: The OLED idea has been deprecated in lieu of a standard bigger RGB LCD

  My first intention was to use a standard cheap, easy to use 7-segment LED display (or 2...or 3) to run menus and selections in this box, but after a while it seemed a bit crazy considering the amount of characters and data that needs displaying. Especially when doing a song setup. Then an OLED display was considered, but it's so tiny for an application that leaves the panel just above floor height and, even though bright, would be like watching a TV in your neighbors living room!


  I've left the old page for future reference for perhaps a different project (I've bought one so it *will* be used eventually, maybe for a wrist watch controller or 
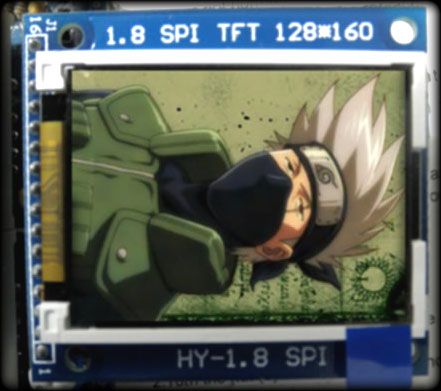
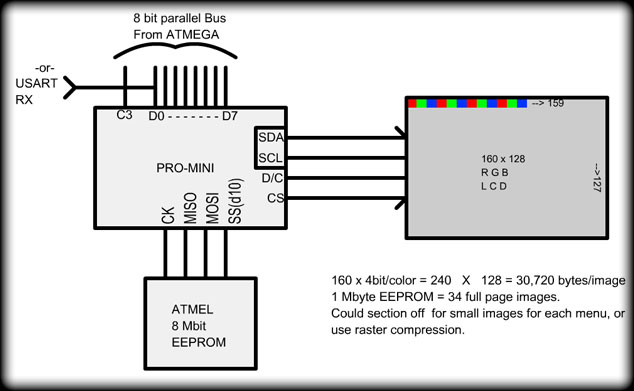
something)
The LCD I have chosen is a 160 x 128 RGB. The S6D02A1A01 pdf is long and complex, but became clearer after a day or two of studying it.

  If you've been LCD searching on Ebay lately, you've probably seen it. The companies (China) that sell them offer no info at all on even what chip it uses. I had to search around until I found a board that looks the same with the same markings.

  It's a pretty simple interface: Data Clk D/C CS. The D/C being the data/command selector.

  I've worked out a simple schematic above using an Arduino Pro-Mini (AT328) but the interface to the ATMEGA has already changed. Everything is connecting via USART, just to speed up the design process. The 8Mbit EEPROM is to store all the fancy graphics, character data, and menus.
  Adafruit or somebody came out with a whole set of code and library items for the Arduino, but I didn't like the load speed or the font they used. It looks like Times New Roman which sucks and is hard to read on anything other than paper it seems. So I won't be using it. I want the graphical design experience anyway!
I'll also switch to a high-speed PIC if Arduino is still too slow (like it is in the videos I've seen). Arduino is a great tool for complex control, but really lacks in the periferal and streaming areas. Sorta reminds me of the old "Basic" programming language. Where's the beef? I've recently used a fast PIC 18F4220 in the Sampler part of this project, 40 MHz should do it!

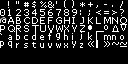
  Trying to work out a character vs. graphics vs. animation on any display is kinda tricky for me as I haven't done much (outside of the PC) so this'll be a real learning experience. Also the size of this display must be taken into consideration. For example, when selecting a song on stage, I don't want a 20 character long name of the song coming up as from standing distance, 5 feet for me, I won't be able to read it at all. On the other hand, when setting up a song, selecting filenames etc, it'd be nice to have a few characters to read...at least 12.
 Herein lays the dilemma, what size chars, and when to use them. 

           After a while, I started to think that perhaps using "pre-designed" menu pages may be the best way to go. Large lettered menus for stuff that may need modifying on stage, or that doesn't need to be small, then smaller lettering / images for the inner setup menus. These 128 x 64's are just a conceptualization of that idea. I made lots.. but they're lacking pizzaz!

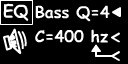
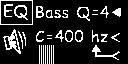
 Next I tried some 2 frame animations, which would be good for choosing a channel ( rotary encoders are also buttons ) to modify EQ on, or when setting up a Preset, whatever.

            
 These I made using Flash. I tried using photo shop but the pixel smoothing and thresholds made a mess. These were designed for the OLED display, but would work fine on the larger LCD display.   These Menus have no data element to modify, so are just display menus. I've devised a couple of methods to insert data into screen areas:
 

1) Use a matrix of pixels that will be replaced by the character(s) to be varied, mostly numerical
2) Use x,y,ID positions embedded in the image file. This example might be x=24, y=32, ID=BeatsIn

 I'm still deciding, but I'm leaning towards embedding data in the end of the file because of a change in the way the files are created, below.
 
  Because I know (Adobe) Flash, I will be using it once again with either Virtual Serial Port Emulator (A freeware port--vport--network connector) or copy and paste to files on the SD Card.  
 The nice thing about fonts is some are wider, and some are narrower, so even if there's only 8 chars/line here, if the empty ends are truncated to 2 pixels, sometimes over 12 chars can fit.I managed to fit all on the capital letters and numbers and punctuation in 8x8 pixel format on 1 page, and they could be used, but they are tiny! ( As can be seen in the 128 x 64 image here)
 They'd still be useful for those "intense" setup menus (secret life altering menus lol) but for me it'd be time to pull out the magnifier.

 Before I go, I must mention how hard I time I am having with the menu setup in the SIAB! With such a wide range of settable parameters that interact with one another, and each having certain characteristics, it's being quite a challenge! There will be more on that soon enough. June 13th 2015


  to  The Wireless "Shoe-Pedal"   or
 ..to Show-in-a-box home page


Disclaimer: This is not an instructional page to build or manufacture the above project, nor are there any guarantees of accuracy herein.
This page is an "of interest" discussion, and the project is intended for my own personal use.
If you have any questions, or wish to pursue this project, you may contact me (Sandra) at fresh(at)freshnelly.com