Stage Control Center Display
|
"Show-In-A-Box" Stage Control Center Display |
||
|
|
||
A Nice Little White Display!
*Note: The OLED idea has been deprecated in lieu of a standard bigger RGB LCD
| My first intention was to use a standard cheap, easy to use 7-segment LED display (or 2...or 3) to run menus and selections in this box, but after a while it seemed a bit crazy considering the amount of characters and data that needs displaying. Especially when doing a song setup. Then a reasonably sized graphical LCD was considered, but it'd be bigger and hard to see in certain situations. Then I discovered the OLED Display. These aren't LCD's they are actually tiny pixels of organic LEDs that act a lot like a really high contrast backlit inverted LCD. | |||
|
Considering that they are available on eBay for under $10, I decided to give
one a try. Once
I received the package I was amazed and dismayed at how small it is, brings
back childhood memories of "It looked a lot bigger on TV!".
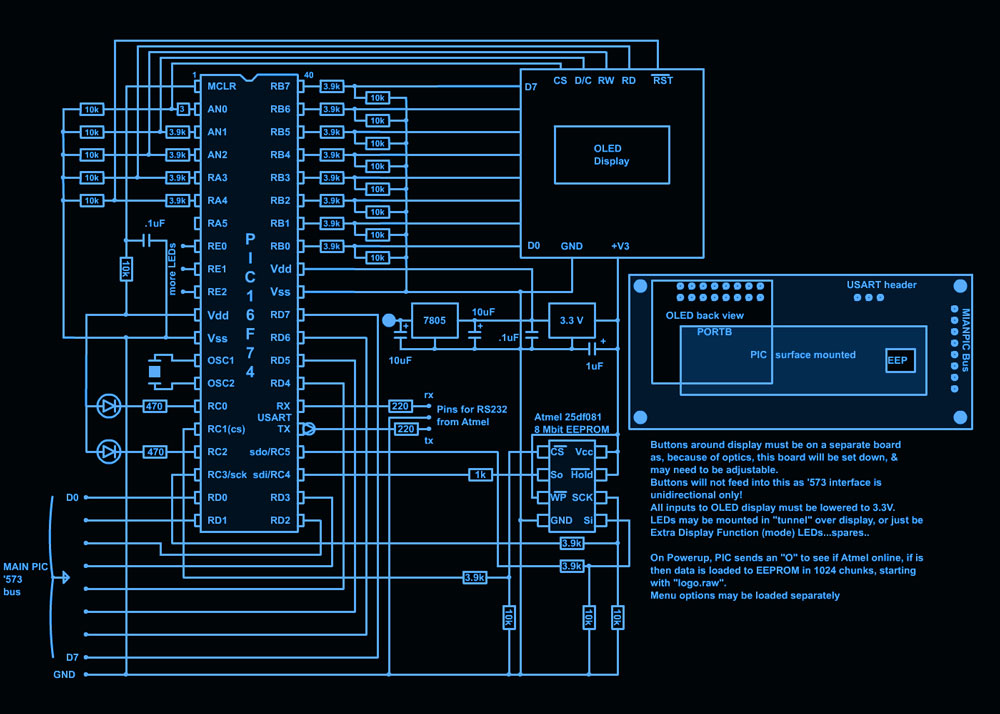
The graphical data sent to be displayed will come from an 8 Mb EEPROM programmed via RS-232 on the USART. This will likely come from files stored in a folder on the SD Card connected to the Arduino. Also some Panel LEDs will be driven from this board from PICs spare ports. It's pretty simple and straight forward, on purpose because the programming and layouts will be something more complex. |
 |
||
Trying to work out a character vs. graphics vs. animation on any display is
kinda tricky for me as I haven't done much (outside of the PC) so this'll be
a real learning experience. Also the size of this display must be taken into
consideration. For example, when selecting a song on stage, I don't want a
20 character long name of the song coming up as from standing distance, 5
feet for me, I won't be able to read it at all. On the other hand, when
setting up a song, selecting filenames etc, it'd be nice to have a few
characters to read...at least 12.
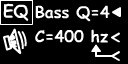
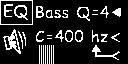
Next I checked out some 2 frame animations, which would be good for choosing a channel ( rotary encoders are also buttons ) to modify EQ on, or when setting up a Preset, whatever.
| |||
| 1) Use a matrix of pixels that will be replaced by the character(s) to be varied |
 |
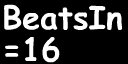
| 2) Use x,y,ID positions embedded in the image file. This example might be x=24, y=32, ID=BeatsIn |
 |
I'm still deciding,
but I'm leaning towards embedding data in the end of the file because of a
change in the way the files are created, below.
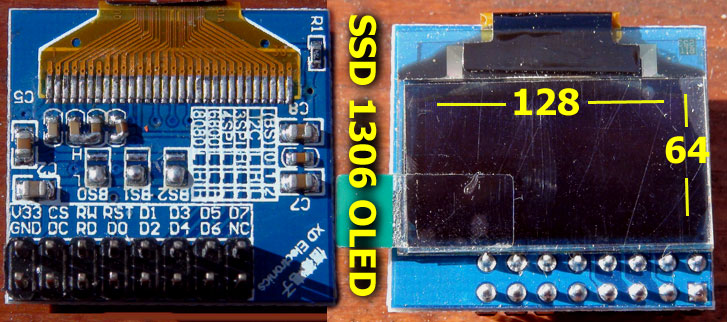
| The
OLED driver SSD1306 uses a bizarre (well to me it is) pixel layout that
sorta doesn't make sense in a general sense, however in applications
that require scrolling on one line, or two, and having a header that
remains static, it does make sense. I think these were designed for
exterior displays on cell phones.
The pixel
configuration of the 128 x 64 display is vertical. This means that each
byte represents a vertical set of 8 pixels, and 8 bytes make a vertical
column of 64 pixels. There's 128 of these. If you are familiar with a
display on a PC or most LCD displays, they generally raster horizontally
and proceed from the top to bottom or bottom to top, same as a TV would.
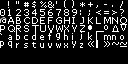
Because of Flash's shared object limitations, I decided to have it create an ASCII HEX print out that can be copied and pasted to an appropriately named file inside a "Menus" folder. If you type the filename otest.swf into the little window, it'll show the image and display the text to be copied into a .txt file named "Channel5.txt". This has been working well so far. The reference to Chars. was accidentally left in as I've been using this to map characters of various fonts and sizes. Try entering ochar16eg.swf which will encode the first 32 characters on the 16 bit comic font. (You'll need to refresh the page first) |
OLED Page Image Creator | ||
|
|||
With this configuration, the mainPIC will be able to control this OLED PIC with a minimum amount of cycles. My present comm method on the parallel bus is the "if bit 7 is set, then it's a command" The byte following a command won't have bit 7 set, so there's the difference that will denote a new byte has been sent. The OLED scans the bus at every opportunity and compares with last byte read. This of course means twice the amount of data if sending ascii data, but it can be sent in a timely manner with not many cycles off of mainPIC. Also, if the commands are a non-used ascii without bit 7 set, then bit 7 could be toggled on every 2nd byte after a "load ascii" command. A terminator (probably 0) would be needed though.
Loading the EEPROM:
Getting data from the SD Card to the EEPROM can be done using the Arduino
that controls the SD Card. I've already written a function into the
Arduino that, upon receiving an "O" on it's 115,200 baud port, starts
loading and sending data from each file in directory MENUS which
includes CHARS files. It's cool to watch it go! I had to slow it down to
allow for EEPROM program time, but still it'll be pretty quick! More on
that later.
Well that's about as far as I've gone thus far. It's starting to make a bit of sense as I plod along. I'll post the hardware fun next! Cheers
Last update April
27th 2014
|
|
|
Disclaimer: This is not an
instructional page to build or manufacture the above project, nor are there
any guarantees of accuracy herein. This page is an "of interest" discussion, and the project is intended for my own personal use. If you have any questions, or wish to pursue this project, you may contact me (Sandra) at fresh(at)freshnelly.com |
![]()