| Day 178 |
 |
Framing in floor
and wall supports |
| Day 178 |
|
Framing in floor
and wall supports |
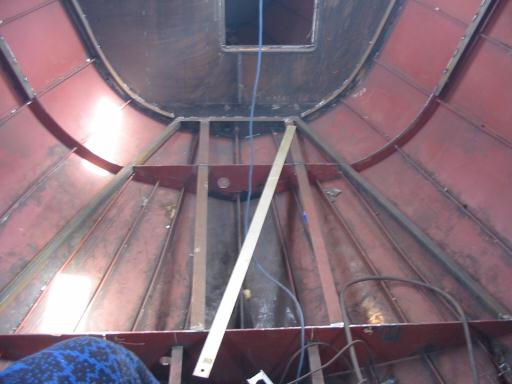
| To mount inside walls or bulkheads and flooring there must be a way of fastening them to the frames. |
 |
The floor must have flat
areas to attach to and also be fairly strong to eliminate
bounce when being walked across. Because access is needed below the floor, floor hatches are inevitable. Careful placement of these frames is required so they can accomodate the interior ( ie seats, berths, cupboards etc ) but also allow for good hatch size. There's the trick! We have changed the interior around a bit from the origional design, and all of a sudden had to decide where the berth would come out to on one side, and how much free space there would be on the other side for the hatch to swing open. |
| We also found
that we will need a secondary hatch in the same room to
access further to starboard because the mast support
frames are right in the way! The whole area is shifted
over to the starboard in fact because the mast is going
to be keel stepped instead of deck stepped, so the entry
is to the starboard as well. Gena welded some straight flatbar on to the bulkhead for panel support but even after much forcing, the angle is too much at the radius and will have to be split to point the right way. |
|
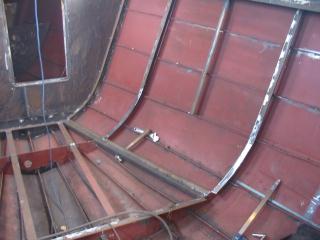
| "T"ing
the frames ( photo to right and above) is a "T" dious job! No, just had to say that! Really it was kinda fun. The angle the frames are meeting the mounting surface makes running a flat bar straight down impossible past the radius curve. ( As Gena discovered earlier ) I found that just adding a short length of flat bar cut to fit and prebent into a curve made dealing with the sharp angle much easier. |
 |
The join can be
seen in this photo as there is a slight change in
direction as the flat bar lays diagonally across the
frame. The base of the floor to wall joint shown almost looks flat. |
|
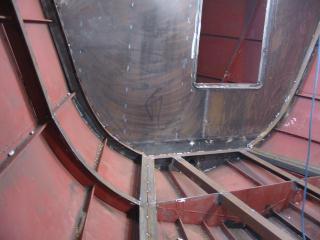
 |
It is about 20
degrees to meet with the panelling. The foam will fill in the 2 1/2" void behind the panelling and should offer some intermediate support over the 2 foot span. I need to put in a false frame around the radius to add some support over the 4 feet there. ( 2nd photo from top ) To the left is a view of the shroud chainplates not fully welded on below. They do use up some room though, the center one in particular. We're not sure what we will do with them yet interior-wise. |
||
Day 178:
6 hours - Put on interior supports or tangs and formed floor area
forward stateroom.
Marine Radios Sandy's CB Shoppe |