| Day 212 |
 |
Coaming hatches |
| Day 212 |
|
Coaming hatches |
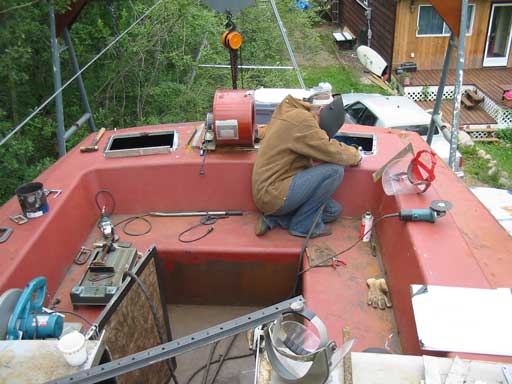
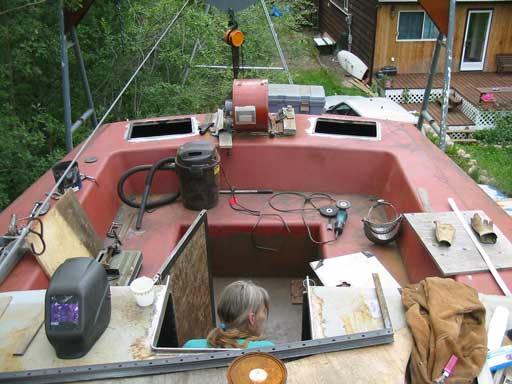
| Today we decided to cut out and make the hatches that enable access into the rather large area beneath the coaming. | |
 Gena bravely tackles "grinding" out a hole |
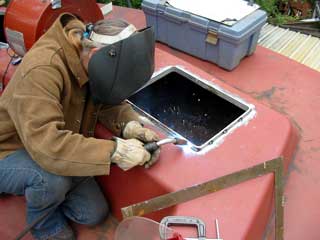
Because the inside of the
coaming was coal-tarred before the top was put on, using
the plasma cutter to cut out the holes was not an option.
Car-tar is tough stuff but any slag off of the cutter
would melt into and embed ( we've seen it happen down
below ) then after a while would rust and always be a
problem leading to a complete recoating. Nope! We'll use the grinder! |
 |
Gena is pretty fearless
with the grinder and accurate with the thin blade.
Myself, I'm terrified of the 16th inch blades, too thin
for my liking. Of course Gena was wearing her very heavy leather welding jacket, but I've been hit by a shattered blade with a heavy winter jacket 15' away. It hurt! The other part of the blade bounced off of the keel and flew a couple hundred feet in the air, moving very quickly. Scarey. Gena did most of the welding, and I helped align the plate as it was already buckled when a temporary frame weld failed after we put the top on. It's really solid now. |
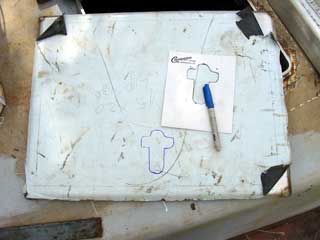 |
I did find a use for the plasma cutter though. The hatches, made from stainless steel and bent to a 45º at the edges by our local machine shop, need to have a bizarre shape cut out for the latches. These are very good quality latches, again of SS, and were purchased off of ebay at a fraction of the cost. They are really designed for floor hatches, but we have several! Aquiring the hinges for these hatches are another matter. It's a difficult set of requirements that must be met shapewise, and also they must be stainless. This would not have been a problem a few years ago, but with the advent of cheap manufacture and popular demand, everything is cadmium, electroplated, or galvanized, or brass, or some other material we can't weld on to the lid. |
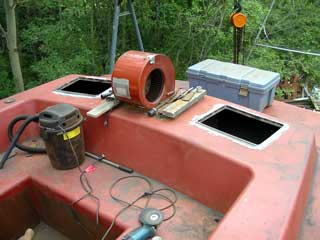 |
I think we'll have a bit of
a time, and may lean towards piano hinges, of which there
are still some made in stainless, There must be! Pianos
still use them. Left and below you can see the finished product. Very nice we think. Origionally the two hatches were going to be parallel to the center hatch, but after placing them at angles, we both agreed it looked way more consistant, and cooler too! Eventually, the thin sides will have little hatches also. Great for long skinny things like fishing poles, floats, mounts, whatever. The winches will take up a bulk of the space along there, but that's another story! |
 |
Day 212:
6.5 hours - Put in coaming hatches, prepared lids, straightened
out coaming warpage
Fresh
Nelly Christmas CD |