| Day 338 |
 |
Forward hatch/deck fittings |
| Day 338 |
|
Forward hatch/deck fittings |
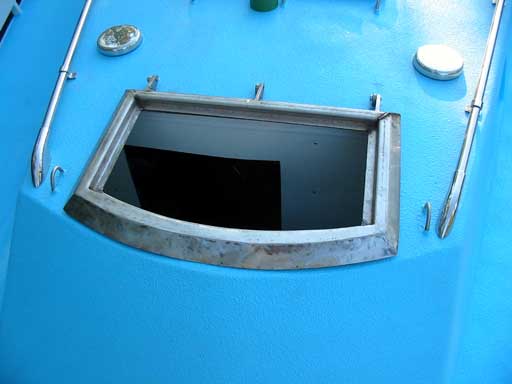
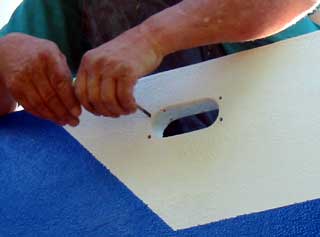
| I finally had the gumption to tacle the
hardest hatch on the whole boat today. It is mostly like all of the
other hatches except it has a round front edge and must angle the same
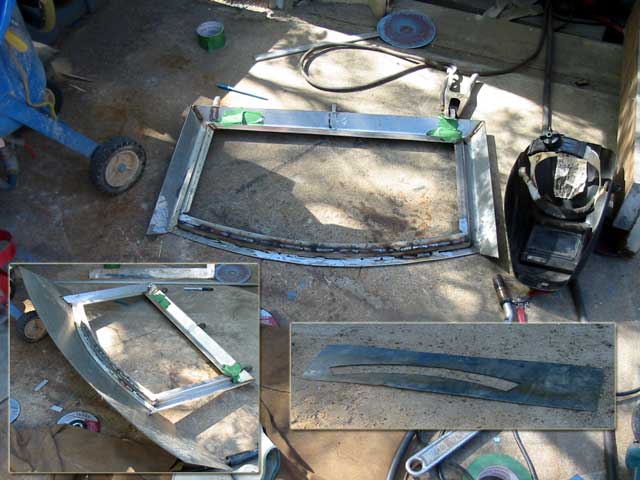
as the forward of the cabin, being right there. As the image above depicts, I first made the "strong" frame out of a piece of 1"x1/4 SS flatbar. This was curved carefully using the bender. It of course can't make a large curve like this so I stepped it through pulling a little each time, then checking it against a pattern from the hatch lip. This can be done after one has a fair bit of experience on the bender he he! |
||
| Next, for the top edge and
the inset edge a length of 1/8" x 3/4" flatbar was bent the same way,
but on the hard edge. The really tough part was finding the curve of the front edge. This was done by laying some 10 gauge SS plate along the edge at the angle of the cabin front and tacking it on. ( See inset, bottom left ) The shape was then marked and cut out ( inset, bottom right ) oversize. After some checking and marking, the edge was brought in to proper depth then welded up. Unfortunately the old distortion popped up from welding such thin plate, so another 3/4" flatbar will be welded in curved under the lip to keep it straight. I don't like that sharp edge anyhow! |
 |
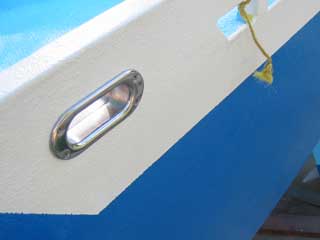
 Gena mounting aft tracks |
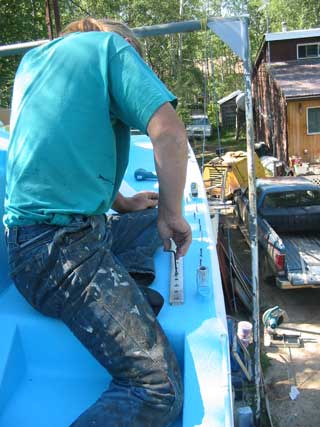
All of the putting it off was
hardly worth it as it wasn't that hard to do after all. A low handle
will be welded across the top as a fender to keep lines off and
provide something to grab when opening.
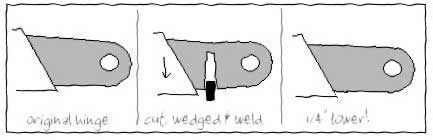
After all that great work, I noticed the
hinges were holding the hatch way too high ( not sure what happen there!
) so I spit them and hammered them down, inserted little bits of 1/4"
thick flatbar then welded them back together like new. Gena kept up the "deck mounting spirit" by drilling out some of the tracks from the alignment size to locking bit size, counter sinking the mounting holes, then screwing them down to the deck. Butyl caulk was used under the 1" flatbar, then the 1 1/2" Top bar was placed on top and tightened down. I had polished them up during the week, but not to a really bright shine. The holes cause distortions, and the shine would amplify this, not to mention the slight waveys in the deck. The pulley car would scratch it all up anyway so no point. |
|
| I did a corrosion test by sprinkling salt on it and letting rain fall on it etc. no rust or even a stain. Love 316 stainless! | ||
 |
This wasn't enough to give
Gena satisfaction of a day well spent ( drilling SS is a slow and
tedious job ) so she decided to put in a hawse pipe. This of course
pulled me away to grind down the inside half. When the bulwark thickness was decided, we didn't know the dimensions of the hawse pipes ( remember the SS turning out to be brass? ) we would be getting.
|
 |
After 3 tries there was good
alignment so Gena drilled and tapped some 3/16" screw-holes, lobbed on
some butyl caulk and the rest is history.
The other 3 holes all have their challenges, but that will be another day. Filling up the decks with hardware is fun,
but things suddenly being there that weren't just a day before
makes for tricky footwork, and, in my case, a real balancing act. |
| Putting the stanchions on would make everything safer but the tarp wouldn't work properly over them so live dangerously we must for now. Guess I better put in those chain-stop pivots at least! | |
 |
|
Day 338:
10 hours - made hatch front, drilled track & mounted 2, mounted a hawse pipe,
welded tabs on 2 other hatches
To DAY 337 |
Radio
repairs in Canada, your last stop...
Email or Call Sandy's CB (780) 986-7433 |
To DAY 339+ |
|
|