| Day 378 |
 |
Battery Box /big
door |
| Day 378 |
|
Battery Box /big
door |
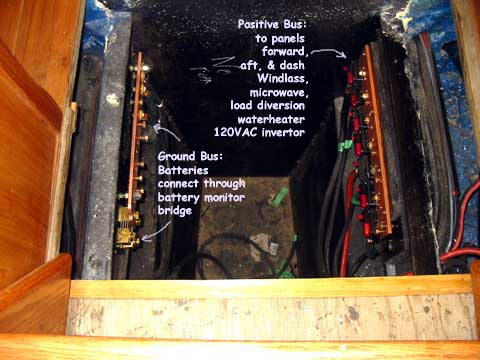
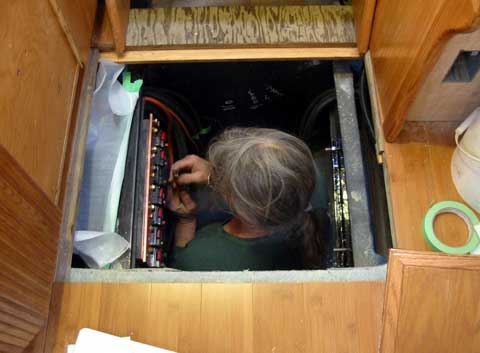
| Gena has found a new place to hide. All day it was "I'm coming through" or "keep your head down". She has mounted the big ground bus and the main breaker bus. | |||
|
The other day she realized
that she hadn't added a ground bolt to the box. This is actually more
complicated than one would think at first glance. This is our ground to
the hull. The only ground. It must be reliable!
At work we see guys trying to mount their antennas and bolts to steel. Some paint the steel so, of course, there is no connection. Others leave it bare, but due to electrolysis and just plain rust, the connection fails quickly. Our (my) solution is to tell them to attach a stainless plate and use grease and more than one bolt, or better yet to weld a stainless bracket on. This is what Gena has done. welding on 2 bolts is a good solution. Bringing up the smaller welder, then protecting everything from the sparks was a bit nerve wracking, but nothing was burned. |
 |
|
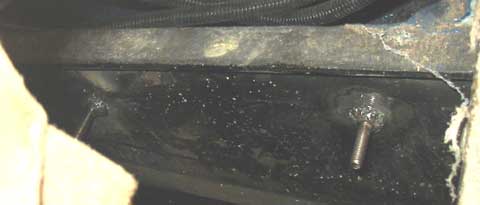 Bolts welded on for main ground.
|
|||
| The battery
monitor bridge on the ground side almost was forgotten! Then for some
reason we thought it was to go on the positive side, good thing we
searched for and found the manual that came with it a year ago! The bridge has 2 monitor sides from which the monitor reads the tiny voltage drop that results in the extremely low ohm value resistor. ( Those values are actually measured in "mho's" - you guessed it, the inverse of ohms ) It monitors charge as well as usage. I would have loved to designed something like this myself as I love that sort of thing, but after having examined this resistor, it's probably best left to the experts! Pretty cool looking thing. Anyway, the 4 AGM batteries can go in any time now, weather permitting. I continued with the fun woodwork. I say fun as I really do enjoy it! Sometimes things don't work out, but that only adds to the experience one accumulates. |
|||||
|
|||||
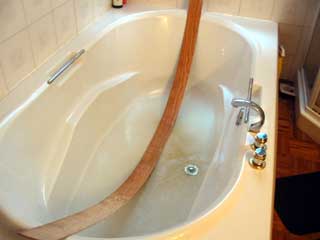
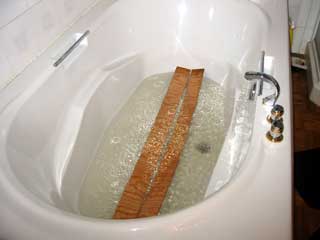
| The only thing about soaking oak ply is the mahogany back ( in this case ) leaches terribly and slightly changes the color of the wood. I didn't really want to steam it as I wasn't sure how the plywood glue would act. One never knows, nor do the vendors really. | A great curve! |
 While I waited for the wood to have it's bath, I finally finished the divider for the locker over the berth I did when less experienced. ( Now I call the less than pretty cupboards "lockers", saving the "cupboard" word for the really nice stuff!) A good coat of gorilla glue along both edges will seal the join ( gorilla glue is waterproof ) and some small nails hold it in place. The door is going to seat into a step I must add next, that will hold the gasket in place. The edges need to be brought down level so the gasket frame can overlap.
|
|
 |
This door may slowly leak (who
knows) but will be strong and close tightly in the event that we need it. It all works out to looks and convenience vs. safety and reliability. A tough one to balance. This seal may only ever be used once, if ever, but in our opinion, should be there. It's better than no seal at all :)
|
Day 378:
6 hours - framed door frame going forward, put in battery box panel and ground
strip
To DAY 377 |
|
To DAY 379+ |