| Day 398 |
 |
Hydraulics,
exhaust valve |
| Day 398 |
|
Hydraulics,
exhaust valve |
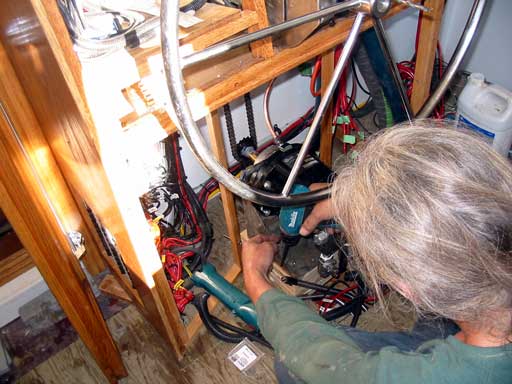
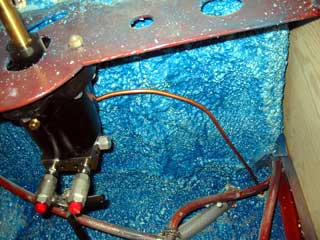
| Once again today I devoted my 13 hours to
polishing the radar arch. ( arrrr! ) and didn't get to have much fun. Gena, on the other hand, had a great time plumbing in the hydraulic fill lines, making compression connections, and bending SS tubing. The photo to the right shows that once again, a "cupboard" is required over the doorway aft. Yes! I will get to it ASAP. |
 |
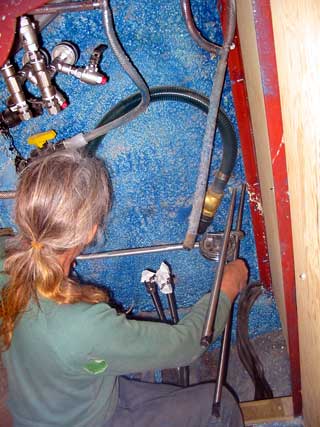
| The hydraulic system requires that no dust or filings end up in the fluid. Even though there is a filter on the fill, the lines themselves need to be blown out. Placing some wadding coated with oil at one end, then shooting it through to a bucket on the other does a good job. It reminds me of the old style document sending tubes in office buildings of the past. Believe it or not, we were in a store a couple of weeks ago that still uses the system. | |
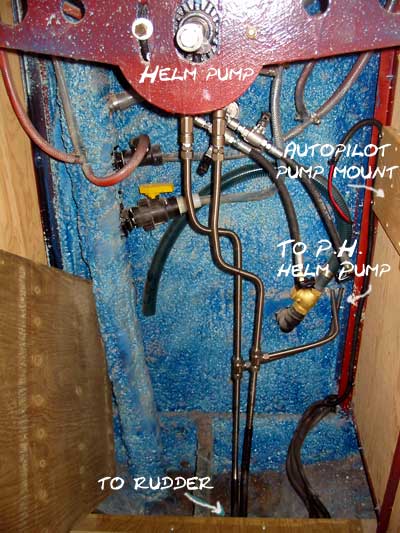
| The air shoots that thing through
at 100 kph hehe. Hence the bucket! The drawing to the right is of the entire system. The over pressure relief has been omitted for clarity, as have some other minor connections, hose etc. Pretty much everything is hooked up except the electric pump. This will be used for the autopilot and runs on 12 volts. Gena was talking about a switch near the arm rest to steer by. Joystick steering would be better I said! I thought she was joking, but realized she wasn't. Ok then! Because the auto pilot uses it already, a disengage switch will also need to be added. I feel the electronic circuitry welling up in my minds eye, but, I guess I better keep it simple stupid. :) |
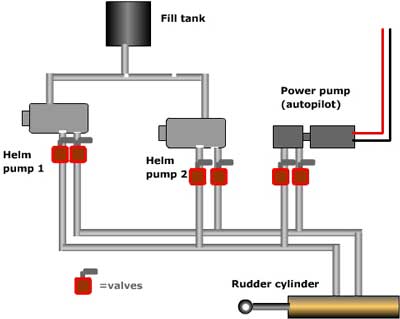 A simplified view of the system, valves to remove pumps |
 |
 Cockpit pump and valves. Note lettering 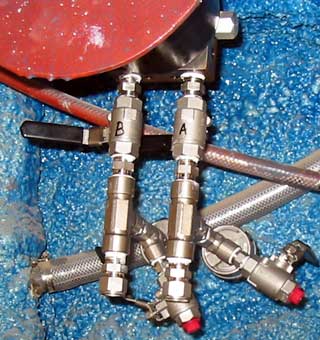 |
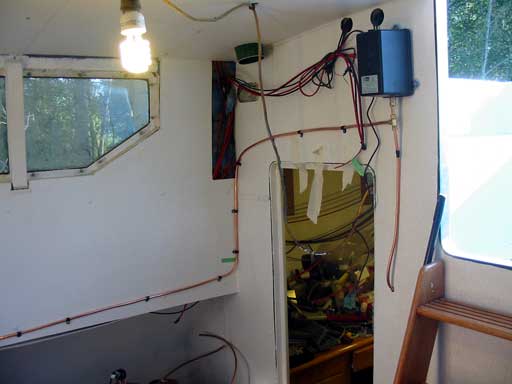
| After seeing all of these lines,
hoses, and wiring under the cockpit in the "supposed to be" closet, I
realized there really needs to be a shelf to brace all this stuff and
protect it from whatever we throw in there. Originally the electric helm pump was to go near the pilot house steering, but there were too many connections and not enough room (hydraulic stuff is big) so it's going aft as well. The vibration of the motor may be a problem as the plywood is basically a large drum head. If so, some spray foam may be needed to muffle it a bit. This is right next to the large berth. |
 |
 |
As a break from buffing and polishing the radar arch, I made the rubber foot pads ( 6 of them ) that it will be mounted on. 2 of them are cut out to feed cables down into the hull. With butyl calk, these should seal ok. |
 |
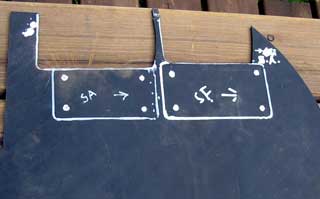
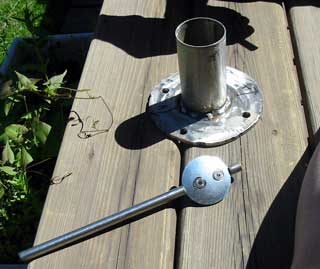
After waiting for me to make an
exhaust valve, Gena decided to make it herself. It was something different
for her as I have been fabbing everything lately. Even though the exhaust outlet is above the waterline, there will be times where waves crash into it, especially when healed over. A solution, apart from a rubber flap on the hull, is to have a valve that closes and is opened only to run the engine. Even though the exhaust pipe goes up 2 feet before leading down to the muffler, if left open water will be able to push it's way in under certain circumstances. It's just not generally good to have sea water in ones exhaust pipe on a continuous basis. |
 |
|
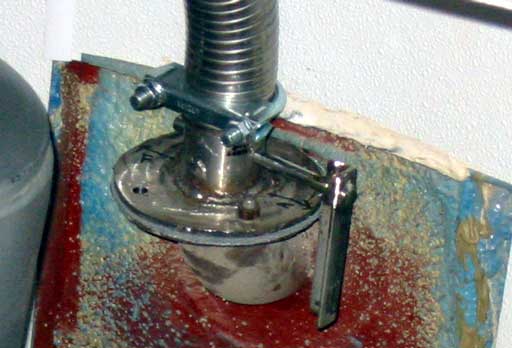
| A small level has
been welded on and may be attached to a pull line or handle or solenoid to
open it while the engine is running. The short video shows it in action,
well done Gena, while the photo below shows it in place. The flex hose
clamped on is waterproof SS pipe. Pretty cool stuff! Isolation has been a real issue here, and even though there is a high heat gasket, the gasket itself has metal in it! The engine will basically be isolated elsewhere so there shouldn't be a problem. The large alternator we have yet to acquire will have an isolated ground post which will work well in this system. |
|
 |
|
Day 398:
13 hours - Made foot pads, polished polished polished, ran lines for hydraulic
fill/helm pump aft, made exhaust valve and mounted
to DAY 397 |
Maximum output? |
to Days 399+ |