| Day 452 |
 |
Wood stuff, dining
table |
| Day 452 |
|
Wood stuff, dining
table |
| Today, I continued with the
wonderful woodworking. As I have mentioned before, it has kind of grown
on me. Wood is more supple than steel, even though one gets the
occasional splinter, and can be done in small portions, or all at
once...like today! There's a number of little projects that were made
and thanks to the magic of not updating the site for months, I am able
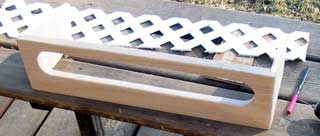
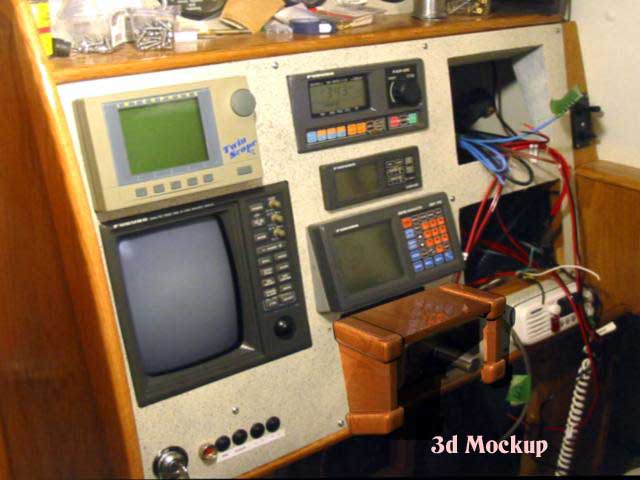
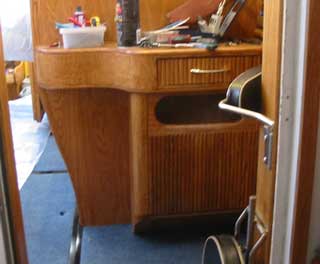
to bring to you the pictures of everything in place. The photo above is really a 3-D overlay on to a real picture. The object I created in virtual space is the tilt steering cover. It's pretty glossy so it looks fake, but it was to let Gena know what I had planned to cover up the ugly tilt steering box. You can see the real thing below. |
|
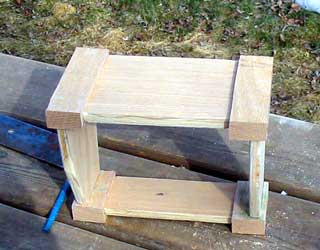
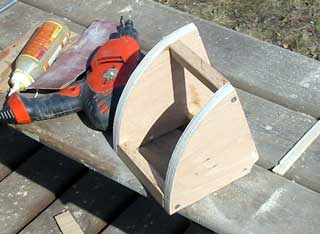
| For such a small, simple thing, it sure comprised a lot of parts. ( photo right ) I routed the plywood in so it would have lots of strength. It must be attached on one end only, through the dash plate. | 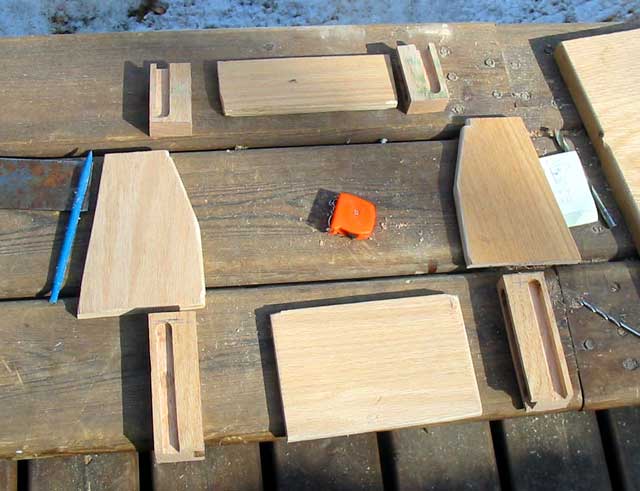 |
 |
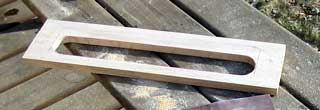
Here it is in it's rough
form. The sharp edges and corners were rounded with the belt sander, then
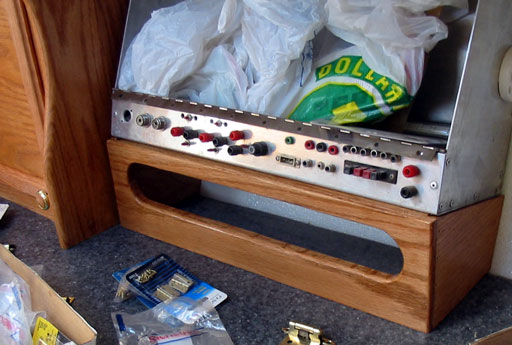
narrow strips attached to screw is to the dash with. The photos to the right are of a cubby hole for my desk. The angle of it is sloped back to accomodate my yet-to-be-built test set for electronics work. I have sized it so the feet will fit just inside of the frame. The soft edges inside the oval were routed with the Dremel router attachment. That thing is so useful! Then I just hand sanded it smooth. |
|
 |
My last little project of
the day, well done at the same time really so glue could dry, was a liitle
cubby hole drink holder shelf thingy for the forward berth. In that whole
area there is nowhere to put earrings, glasses, whatever one takes off in
bed. So this was important.
The thin 1/8" ply was wet some then held over a burner on the stove and hand bent carefully. |
 |
| Next, the ply should be carefully lined up to where it must sit and drilled with a tiny bit for some 3/4" nails. Then Gorilla glue was applied and the nails bet over before they were all the way in. Slowly I worked along every 2 inches with nails, each time purposely bending them. Once the glue dries, the nails are pulled and the little holes filled . I do it this way because I have found that the nails would pull right through it all the way in. Then the board would flop off! | ||
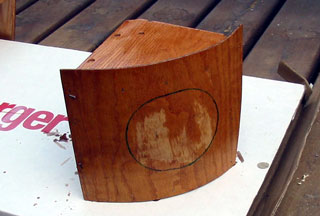
| Once the glue was set up, I
jig sawed the oval hole out. I am going to find some edging to protect it.
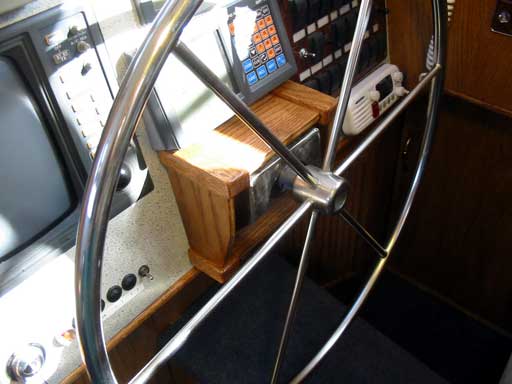
The same edging they use on speaker grills. We have some some where! Well there the steering cover is in place. It's not exactly as the mock up, but looks fine. The SS on the front will be mac-tacked with fake wood pattern. Below is the drawer I started yesterday in place, with a matching handle to make the navigation desk area complete. |
 |
 |
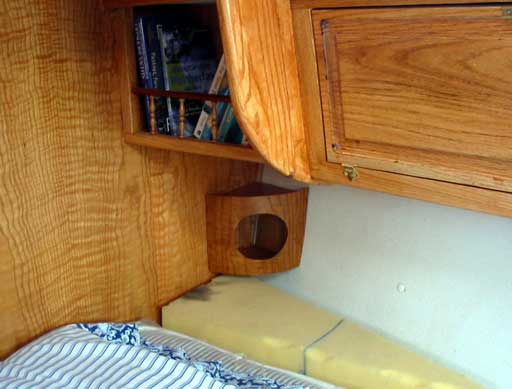 |
| The photo above-right is of
the cubby hole over the front berth. Getting those angles right on the
hull edge was just a try and fit/ mark/ try and fit again ritual. I think a
lot of boat carpentry is done that way...well at least until you've done it
for a few years. The next picture is the cubby on my desk. now you can see how it all fits together. The whole thing is 22" long so it's a pretty good size. It'll be a well used area. One day I'll finish the test/design unit above it. I built one 3 years ago, but now parts are better and I know more than then so this'll be even better! |
 |
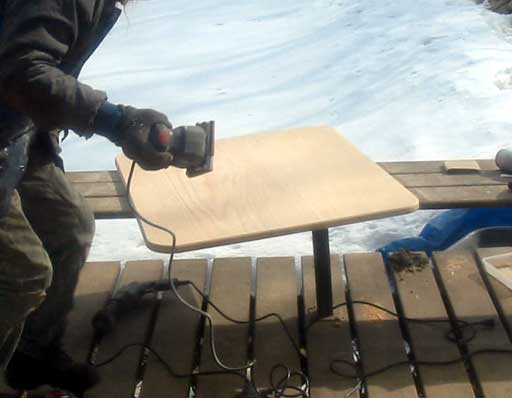 |
Gena continued on the table after I routed the edges for her. It took her quite a while with the palm sander. I think it sands slower when it's cold like this, perhaps the wood is harder when cold. The table needed to be trapezoidal in shape to match the angle of the seats. The bulkheads are parallel, but the hull angles in going forward. This is why a lot of boats have round tables. We just think it would waste a good area to chop all of the corners off! I will make some removable 1.5" fences later. I think using pins and drilling 3/16" holes would work, they don't need to be much bigger than that. Fences are so stuff doesn't slide off the table if someone goes by and makes a huge wake. ( even though most anchorages have some sort of speed limit sign posted by locals, some power boaters are foolish and just do it to get a rise out of others )
|
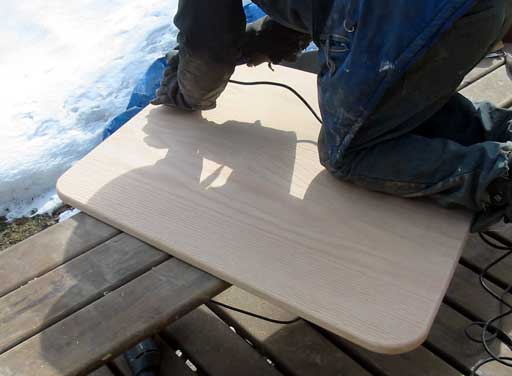 |
After the table was
sufficiently sanded, Gena attached the stainless frame and pipe, then the
flanged larger pipe was bolted down securely.
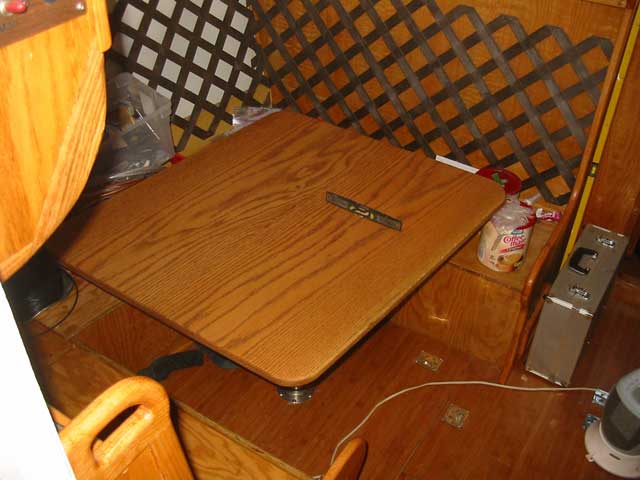
As can be seen below, after one coat of oil, it looks great! Notice how she flipped the boards edge to edge so the wood grain would come closer to a constant flow. We plan on butchering one of our "tiger paw" style end tables ( really nice tables! ) to get the 3 legs. That'll add a more homey feel and add to the stability of the table. But that won't be until we're ready to move out of the house! |
 |
|
Day 453:
9 hours -- made steering box cover, cubby hole for desk, cubby hole/shelf for
forward berth, and mounted table.
|
If you have any comments, concerns,
or just want to say hi! Click mailme ..to Main page |