| Day85 | 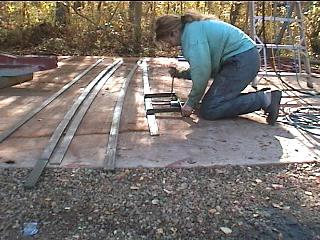 |
Putting up cambered poopdeck frames |
| Day85 | |
Putting up cambered poopdeck frames |
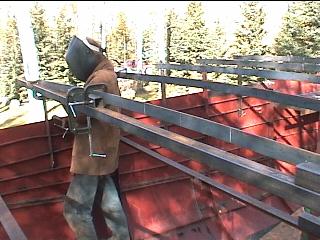
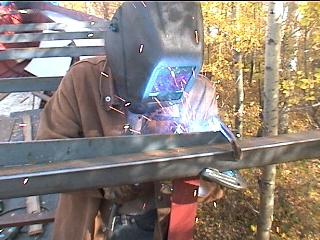
| Today a lot was done! While Gena finished off "upstairs", I curved 7 pieces of 2" flatbar for the poopdeck ( and cockpit seat ) frames. | |
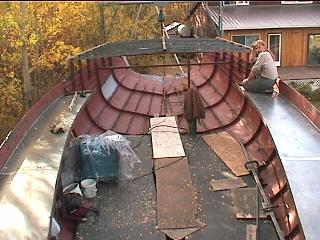
| I used the old frame bender we made last year for curving rogue stringers and aligning frames. 6 1/2 180 degree turns every 6 inches starting from the center going out would get them pretty close to the prescribed camber. Then a bit of touching up here and there would get it exactly even with the "origional" made from the blue-prints. At first it doesn't seem like it's even starting to curve at all, but then slowly it takes shape. ( Pic above ) | 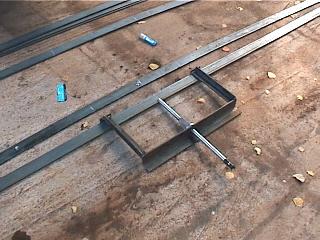 |
 |
When putting up frames, we
used a 2x2 square tubing for level and something to clamp
to, and tacked them in place. Once released they flopped
around but would come back evenly. The trick is to make
sure the centers are flowing back (or level) as well as
the ends. At first glance this seems to be a simple
framework, but, as in everything on a boat, there are
really very few straight lines! Ie. - The camber must remain the same from fore to aft on the poopdeck. (The plate wouldn't compound curve) - The top of the sides must be straight and level.( Or it would end up looking like a saddle! ) - But the beam narrows as one approaches the transom... - So how can the poopdeck center, ( imaginary, as this will be cut out for the cockpit floor ) be level or staight?? |
| Well, it isn't! Ahhhh the beauty and complexity of a sailboat. It boggles the mind ! | |
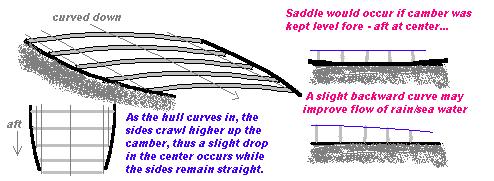
Maybe
my little drawing would explain better (exaggerated of course!)
|
|
| Hmmm... downward curve isn't even noticable in pics, but it is there ...honest! | |
Day 85:
8 hours - Made cambered frames and put on for poopdeck
Marine Radios Sandy's CB Shoppe |